Category Archives: Food & Entertaining

OTTOLENGHI’S CHOCOLATE KRANTZ CAKE

23 October 2013

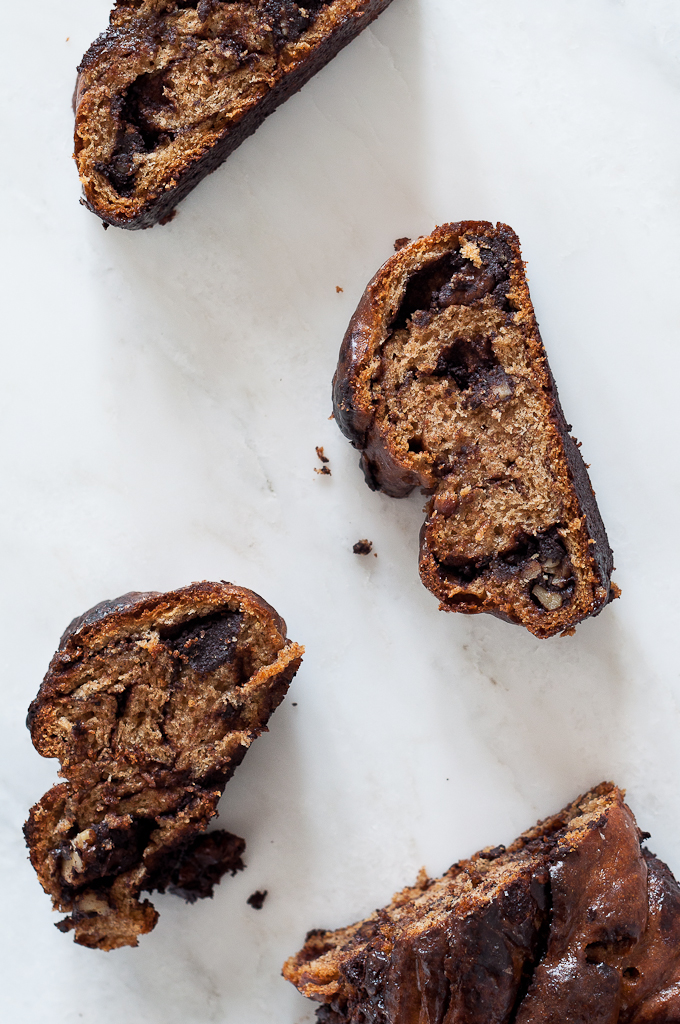
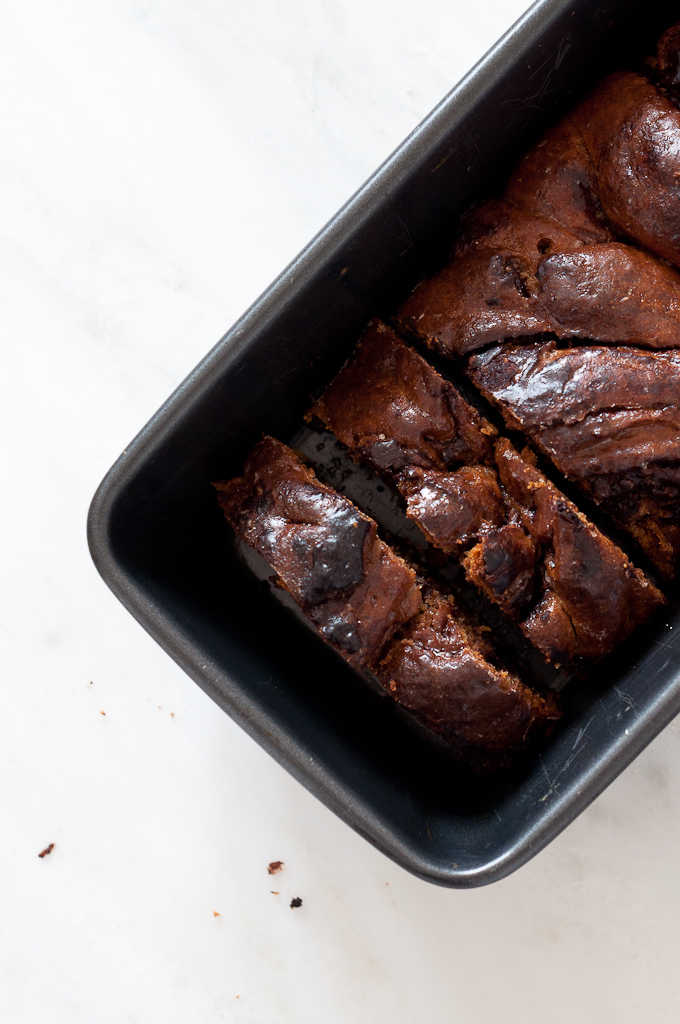
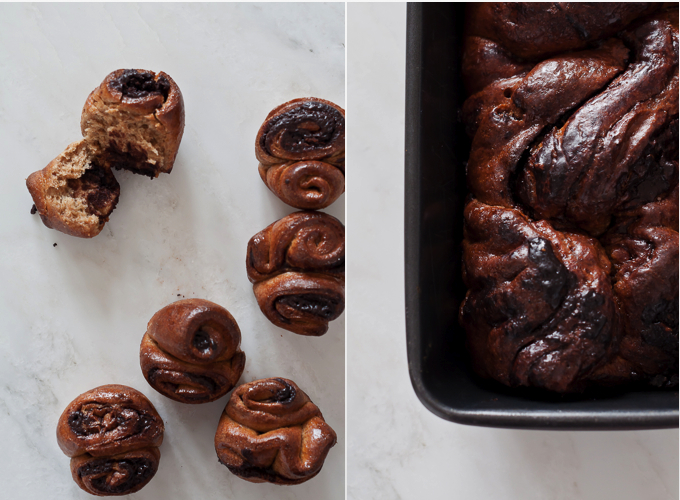
Thanks to the fabulous Italian photographer Valeria Necchio I soooo want to make this Chocolate Krantz Cake by Yotam Ottolenghi which fits right in my MOODY WEEK with it’s dark chocolate core.

She’s one of the best food photographers (and chefs!) around and I adore her modern take on food photography. Her blog Live Love Food is a favourite of mine and her featured recipes are always inspiring. How can you not love a girl who says:

I love eating and at the same time I like feeling good. So, I found my balance in seasonal, local food and healthy cooking with high quality key ingredients…

By her own admission she was a bit wary of making this cake which comes with a gentle warning of ‘it isn’t easy or quick’ by Yotam himself but going through the process she had a great time and the cake plus her freestyle left-over buns turned out perfectly – just like her photos.

Below is the recipe from Jerusalem by Yotam Ottolenghi & Sami Tamimi via Tara O’Brady’s blog Seven Spoons.

copyright-Valeria-Necchio-Chocolate-Krantz-Cake-01

copyright-Valeria-Necchio-Chocolate-Krantz-Cake-02

copyright-Valeria-Necchio-Chocolate-Krantz-Cake-05

copyright-Valeria-Necchio-Chocolate-Krantz-Cake-03

copyright Valeria Necchio Chocolate Krantz Cake

CHOCOLATE KRANTZ CAKE (AND FREESTYLE LEFT-OVER BUNS)

[Extract from the book]

Making a krantz isn’t easy or quick. You need to let the dough rise overnight and then fill and shape it, which is quite an elaborate process. But […] it is well worth it! […] They are just the sort of thing everyone hurls themselves at as soon as they come out of the oven. They will also keep for up to two days at room temperature, wrapped in foil, and up to a couple of weeks when frozen. For a fabulous alternative to the chocolate filling, brush each dough half with 6 tbsp / 80 g melted unsalted butter and then sprinkle with 1⁄2 cup / 120 g light muscovado sugar, 1 1⁄2 tbsp ground cinnamon, and scant 1⁄2 cup / 50 g coarsely chopped walnuts; then roll as described in the chocolate version.

Makes 2 loaves

INGREDIENTS:

For the dough:
4 cups / 530 g all-purpose flour, plus extra for dusting
1/2 cup / 100 g superfine sugar
2 teaspoons fast-rising active dry yeast
grated zest of 1 small lemon
3 extra-large free-range eggs
1/2 cup / 120 ml water
rounded 1/4 teaspoon salt
2/3cup / 150 g unsalted butter, at room temperature, cut into 3/4-inch / 2cm cubes
sunflower oil, for greasing

For the chocolate filling:
scant 1/2 cup / 50 g confectioners’ sugar
1/3 cup / 30 g best-quality cocoa powder
4 oz / 130 g good-quality dark chocolate, melted
1/2 cup / 120 g unsalted butter, melted
1 cup / 100 g pecans, coarsely chopped
2 tablespoons superfine sugar

For the sugar syrup (enough for both cakes):
2/3 cup / 160 ml water
1 1/4 cups / 260 g superfine sugar

DIRECTIONS:

For the dough, place the flour, sugar, yeast, and lemon zest in a stand mixer fitted with the dough hook and mix on low speed for 1 minute. Add the eggs and water and mix on low speed for a few seconds, then increase the speed to medium and mix for 3 minutes, until the dough comes together.

Add the salt and then start adding the butter, a few cubes at a time, mixing until it is incorporated into the dough. Continue mixing for about 10 minutes on medium speed, until the dough is completely smooth, elastic, and shiny. During the mixing, you will need to scrape down the sides of the bowl a few times and throw a small amount of flour onto the sides so that all of the dough leaves them. Place the dough in a large bowl brushed with sunflower oil, cover with plastic wrap, and leave in the fridge for at least half a day, preferably overnight.

Grease two 2 1⁄4-lb / 1kg loaf pans (9 by 4 inches / 23 by 10 cm) with some sunflower oil and line the bottom of each pan with a piece of waxed paper. Divide the dough in half and keep one-half covered in the fridge.

Make the filling by mixing together the confectioners’ sugar, cocoa powder, chocolate, and butter. You will get a spreadable paste. Roll out the dough on a lightly floured surface into a rectangle measuring 15 by 11 inches (38 by 28 cm). Trim the sides** to make them even, then position the dough so that a long side is closest to you. Use an offset spatula to spread half the chocolate mixture over the rectangle, leaving a 3⁄4-inch / 2cm border all around. Sprinkle half the pecans on top of the chocolate, then sprinkle over half the superfine sugar.

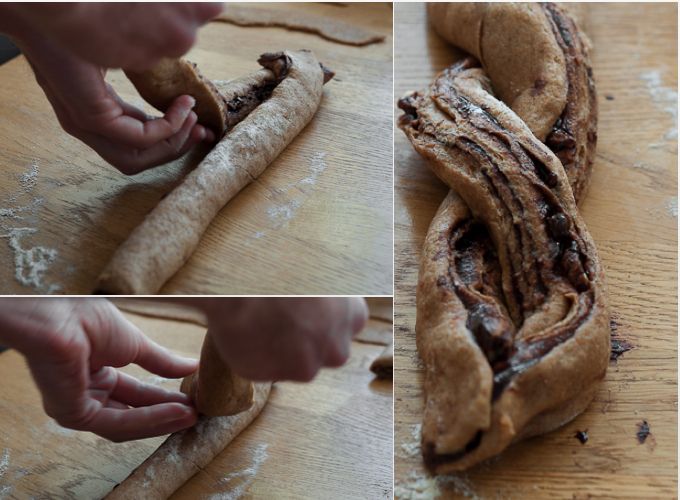
Brush a little bit of water along the long end farthest away from you. Use both hands to roll up the rectangle like a roulade, starting from the long side that is closest to you and ending at the other long end. Press to seal the dampened end onto the roulade and then use both hands to even out the roll into a perfect thick cigar. Rest the cigar on its seam. Trim about 3⁄4 inch / 2 cm off both ends of the roulade with a serrated knife. Now use the knife to gently cut the roll into half lengthwise, starting at the top and finishing at the seam. You are essentially dividing the log into two long even halves, with the layers of dough and filling visible along the length of both halves. With the cut sides facing up, gently press together one end of each half, and then lift the right half over the left half. Repeat this process, but this time lift the left half over the right, to create a simple, two-pronged plait. Gently squeeze together the other ends so that you are left with the two halves, intertwined, showing the filling on top. Carefully lift the cake into a loaf pan.

Cover the pan with a wet tea towel and leave to rise in a warm place for 1 to 1 and 1⁄2 hours. The cake will rise by 10 to 20 percent. Repeat the whole process to make the second cake.

Preheat the oven to 375°F / 190°C, making sure you allow plenty of time for it to heat fully before the cakes have finished rising. Remove the tea towels, place the cakes on the middle rack of the oven, and bake for about 30 minutes, until a skewer inserted in the center comes out clean.

While the cakes are in the oven, make the syrup. Combine the water and sugar in a saucepan, place over medium heat, and bring to a boil. As soon as the sugar dissolves, remove from the heat and leave to cool down. As soon as the cakes come out of the oven, brush all of the syrup over them. It is important to use up all the syrup. Leave the cakes until they are just warm, then remove them from the pans and let cool completely before serving.

* Notes from Tara O’Brady:
• I used 100% regular wholemeal flour instead of the all-purpose/plain flour and it worked perfectly fine.
• Instead of superfine sugar, I used demerara caster sugar, also with good results.
• I didn’t have any lemons when I made these so I used 1 tsp pure vanilla extract in its place.
• I used large rather than extra-large eggs and they were OK.
• Since I don’t keep sunflower oil in the house, I used ghee – which worked well for the task.
• I like very dark chocolate, so I used 85% dark chocolate – in my humble opinion, it made a great contrast with the sweetness of the syrup and balanced things out wonderfully.
• I swapped pecans for walnuts. I am sure hazelnuts would be fantastic, too.
• I ended up using less syrup (about 2/3 of the total). Although the author heatedly suggests to use all the syrup, I am not fond of super-sugary stuff, so I think I will use even less next time. I think you should listen to whatever your sweet tooth tells you…

** Notes from Valeria Necchio:
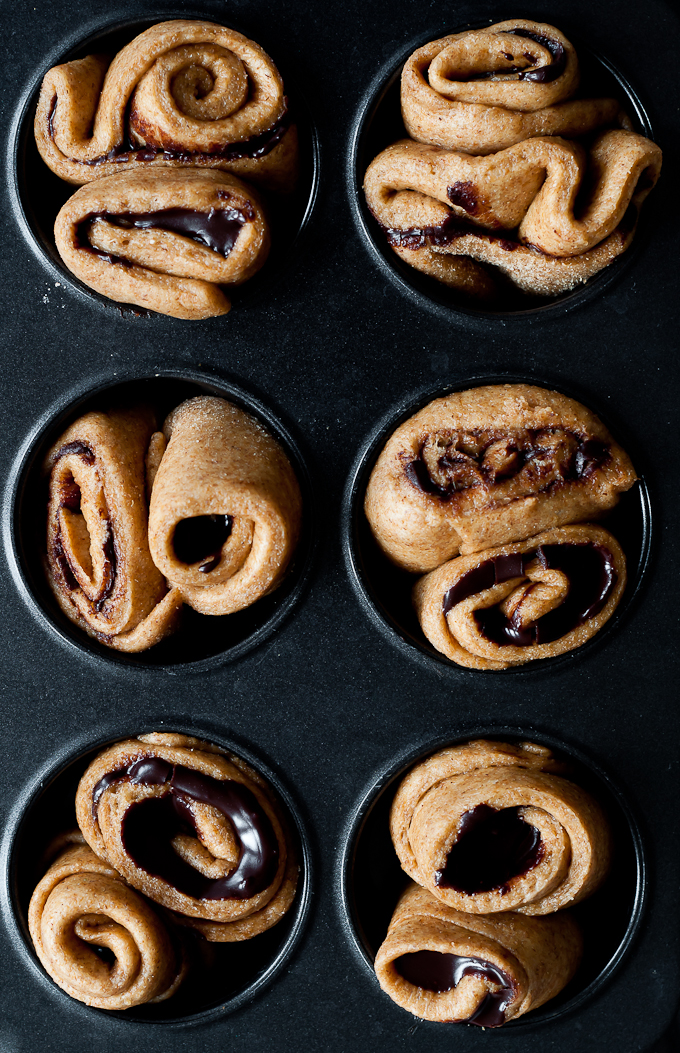
• I used the scrapes of dough and a bit of leftover chocolate filling to make those little rolled buns (pictured above), which I baked in a muffin tin for less than half the amount of time it took to bake the loaves. They were delicious and totally moreish. I will try to make cinnamon buns out of this recipe sometime soon – as I think the results might be overwhelmingly good.

Enjoy and I hope you’re inspired!

Annie Signature Stylejuicer

Photography | Valeria Necchio
Recipe | Yotam Ottolenghi
Notes | Seven Spoons & Valeria Necchio

TOTALLY BLOKEY PUMPKIN AND SAGE SOUP

10 October 2013

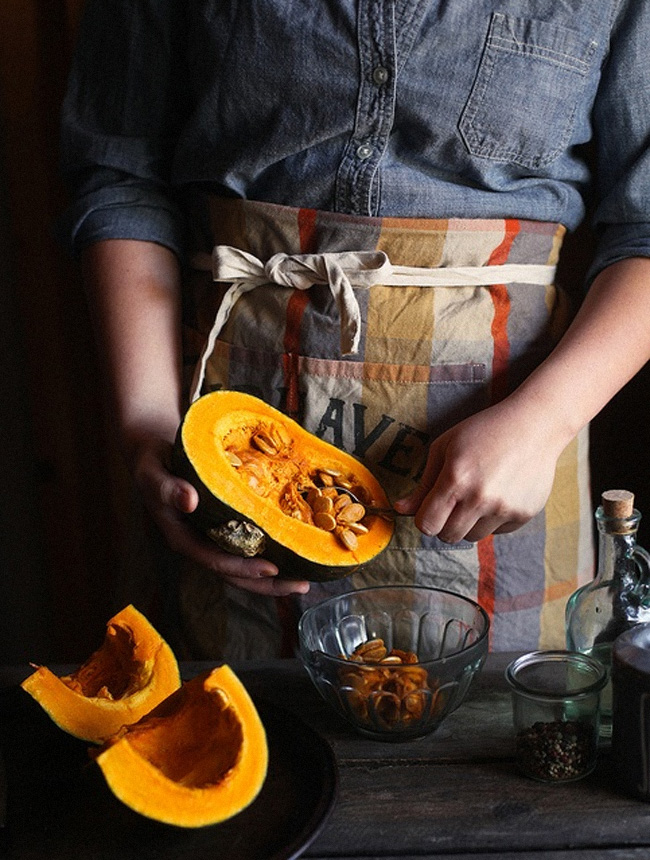
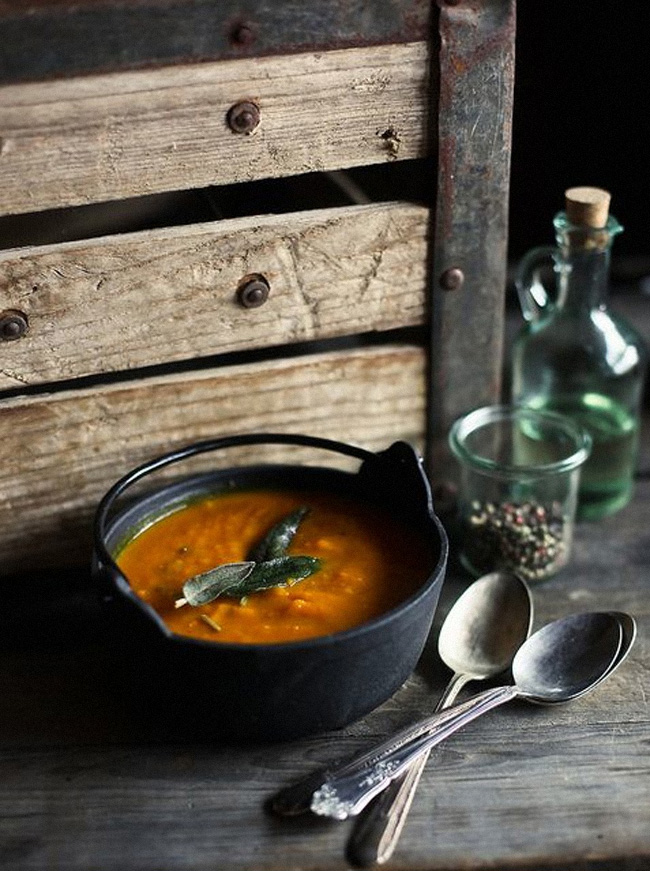
I’ve been looking for the right ‘manly’ recipe for my MEN’S WEEK here on Stylejuicer when I came across this gorgeous photo in my Tumblr archive of a proper bloke scooping out a pumpkin and making soup – and it’s not Jamie Oliver!

Pleased to avoid the manly burger clichés I found the perfect soup recipe to go with it on skinnytaste.com. It’s best to use sweet or sugar pumpkin for this but you could easily substitute with butternut squash. It’s super easy to make, healthy and filling and tastes just as nice when reheated. What’s a guy not to like?

I love scooping out pumpkins and can’t wait to feature some more orange giants in a couple of weeks for Stylejuicer’s SPOOKY WEEK. Stay tuned!

Pumpkin-Sage-Soup-via-stylejuicer01

Pumpkin and Sage Soup via Stylejuicer.com

PUMPKIN AND SAGE SOUP
INGREDIENTS:

2 medium (6 lbs total) sugar pumpkins (you can substitute with butternut squash)
1 tbsp butter (olive oil for dairy-free)
3/4 cup shallots, diced
3 cloves garlic, chopped
4 cups (950ml) fat free, low sodium chicken broth (vegetarians can use vegetable stock)
1 tbsp fresh sage, plus more for garnish
salt and fresh pepper to taste
reduced fat sour cream for garnish, (optional)

DIRECTIONS:

Heat the oven to 200°C (400°F). Using a heavy, sharp knife, cut the pumpkins in half. Scoop out seeds and place on a baking sheet; bake for 1 – 1-1/2 hours.

When the pumpkin is cooked and cool enough to handle, use a spoon to scoop out the flesh. This should make about 5 cups.

Add butter to a large pot or Dutch oven, on medium heat; add shallots and sauté until tender, about 4 minutes. Add garlic and cook an additional minute. Add pumpkin and broth to the pot, along with sage, salt and pepper and bring to a boil. Simmer, covered for about 15 minutes.

Blend in a blender or immersion blender and blend the soup until smooth.

(Optional) Garnish with light sour cream and sage. Makes 8 1/2 cups (roughly 2 litres).

Enjoy and I hope you’re inspired!

Annie Signature Stylejuicer

More information | skinnytaste.com
Photography | I tried finding out who took these gorgeous shots but didn’t get anywhere. If you know who did please email me at annie [at] stylejuicer [dot] com and I’ll happily add the credit and link.

RASPBERRY RICOTTA CHOCOLATE CAKE INDULGENCE

21 August 2013

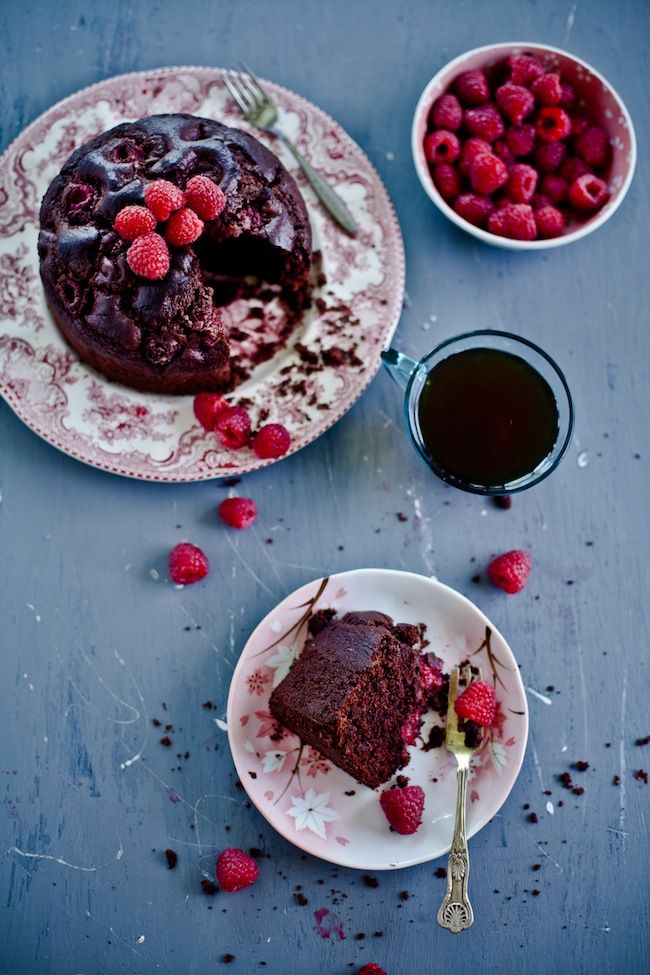
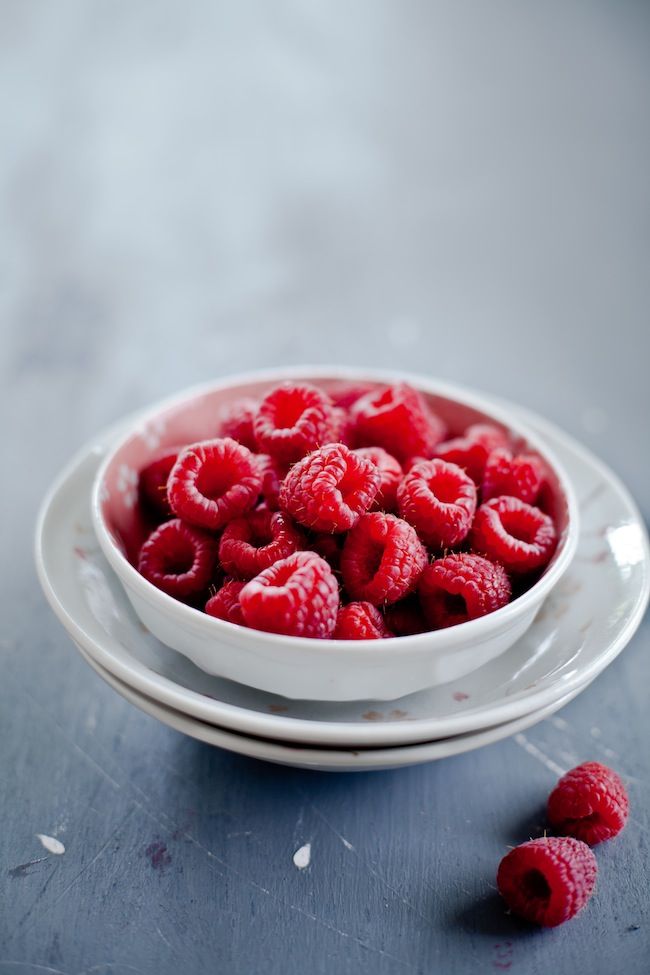
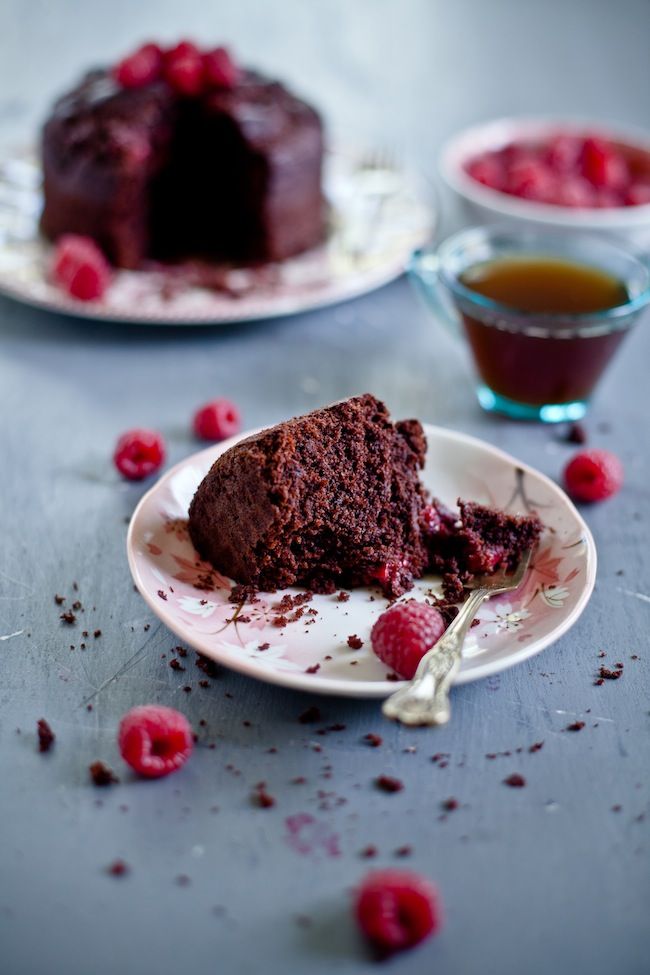
Ah, chocolate… I’ve got a crush on you! Honestly, at a push I can live without most food groups but chocolate!? Now, that would be almost impossible for me. Having said that I don’t actually like desserts or cakes that are too sweet or sticky and this raspberry, ricotta and chocolate cake sounds like my perfect chocolate fix. [What do you mean chocolate isn’t a food group!?]

It’s from one of my favourite American food bloggers, the talented Kankana Saxena who experimented with a recipe by Liren of Kitchen Confidante and found that adding ricotta and raspberries to the mix just made her day! Make that days as it sounds like she had it for lunch and dinner. What an endorsement from a professional cook and food writer. She says about her own creation:

With a striking balance of sweetness from raspberries, richness from ricotta and bitterness from cocoa powder, this cake totally made my day. It was crumbly, soft, not overly sweet and perfect with a cup of tea or coffee.

If you’re like me and can’t get enough of Kankana’s creations follow her blog Playful Cooking and subscribe to her email updates. Her gorgeous photos are already on my Pinterest FOOD board and you can find more recipes by her in the Stylejuicer FOOD category: ricotta and sage bread and zesty fish curry with coconut milk.

copyright-PlayfulCooking.com-via-Stylejuicer.com-04

copyright-PlayfulCooking.com-via-Stylejuicer.com-05

Raspberry Ricotta Chocolate Cake by PlayfulCooking.com

RASPBERRY RICOTTA CHOCOLATE CAKE
TIMINGS:

PREP TIME: 15 minutes
COOK TIME: 40 minutes
TOTAL: 60 minutes
SERVING SIZE: Makes a 6 inch round cake

INGREDIENTS:

225g (1-1/2 cups) all-purpose flour
75g (1/2 cup) cocoa powder (Kankana uses dutch dark cocoa powder)
2 teaspoons baking powder
1/2 teaspoon salt
175ml (3/4 cup) oil
225g (1 cup) sugar
2 eggs
55g (1/2 cup) ricotta cheese
60ml (1/4 cup) milk
150g (1 cup) fresh raspberries

DIRECTIONS:

Preheat oven to 180C (350F).
In a bowl, combine all the dry ingredients (flour, cocoa powder, baking powder and salt). In a separate bowl, whisk egg and sugar until they’re mixed together. Add oil, ricotta and milk and give another whisk. Empty the mixed dry ingredients to the wet ingredients bowl and whisk again. Finally, drop the fresh raspberries and using a spoon, mix it lightly.
Pour the cake batter in a six-inch round baking pan and bake for about 40 minutes or until it’s baked through. Check by inserting a knife or tooth pick right in the center. If it comes out clean, the cake is ready.

Enjoy and I hope you’re inspired!

Annie Signature Stylejuicer

More information & photography | Playful Cooking

‘ALWAYS-SO-HUNGRY’ BLOGGER STEFFI DELLNER TALKS ABOUT FOOD, LIFE & LOVE

6 August 2013

I’m curious by nature and love chatting to people, the more unusual and different they are the better! So I was chuffed to bits when UK food blogger and fellow expat Steffi Dellner of AlwaysSoHungry agreed to a good old grilling (excuse the very bad pun). Steffi was recently featured as one of four UK food bloggers by Oliver Thring in the Sunday Times, though she’s far too modest to be bragging about it. Below she talks about her passion for food and who inspired her, what made her start blogging and who she’d like to share a bottle of rosé with.

And she even gives us a seasonal treat of a recipe inspired by her Swedish roots:
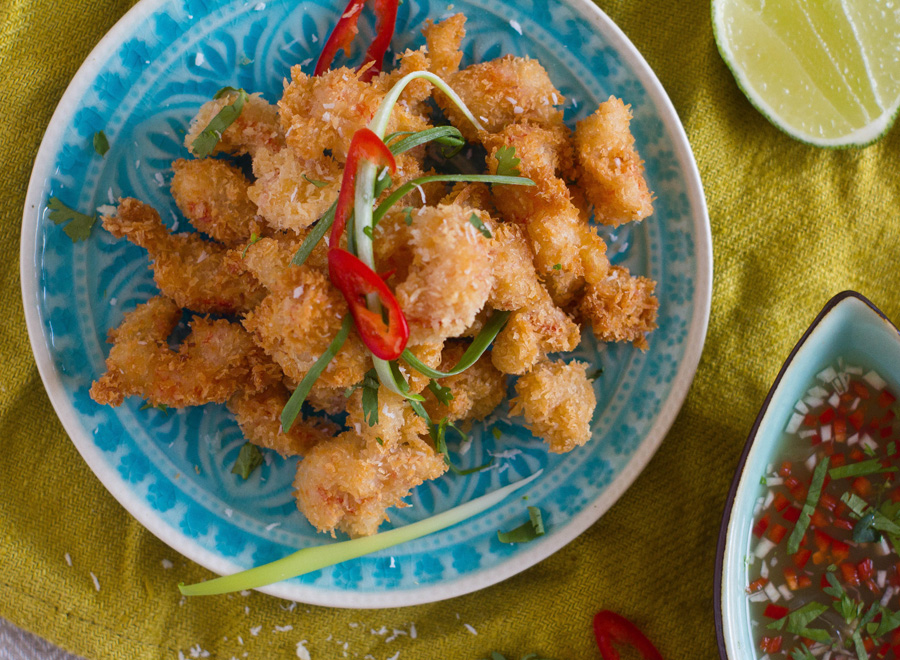
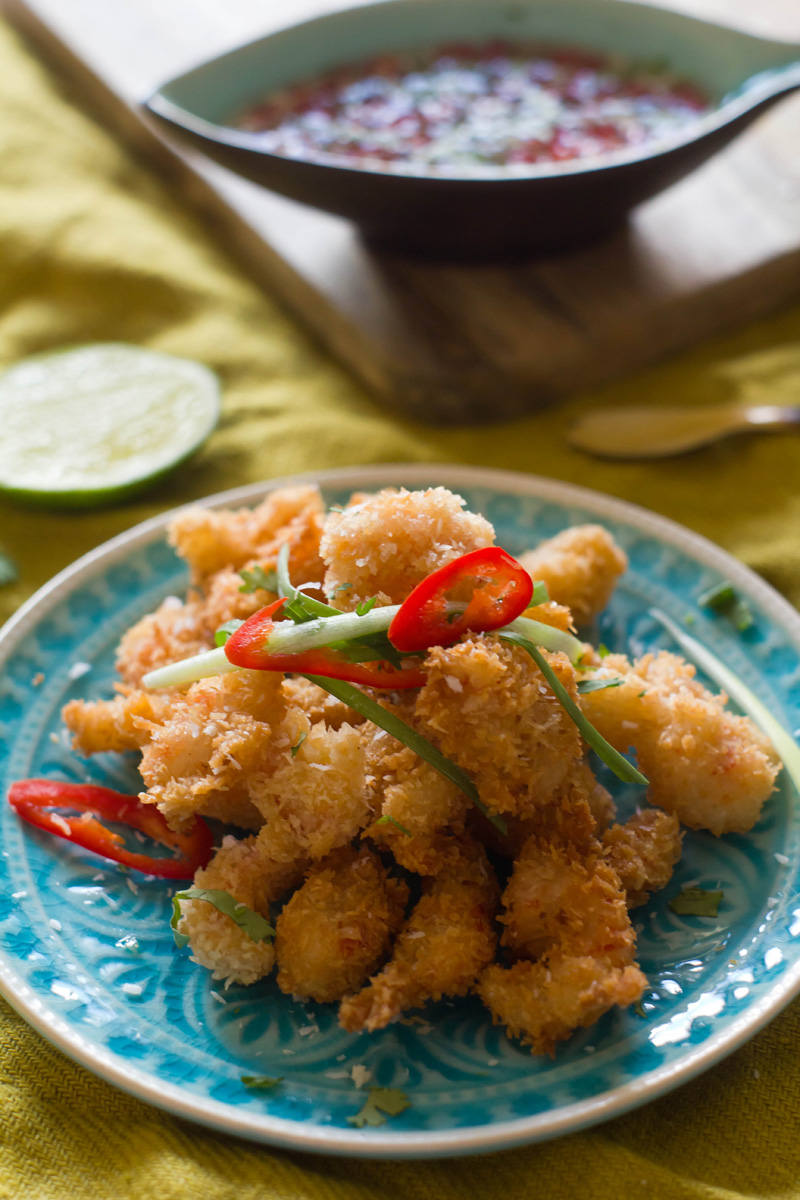
COCONUT CRAYFISH WITH YUZU DIPPING SAUCE. Yum…

WHAT ARE YOUR EARLIEST MEMORIES OF COOKING?

There are quite a few formidable, spatula-wielding women in my family, so I’m not sure if my love of cooking and food is innate or if it was forced upon me! In particular, I have wonderful memories of my maternal grandmother’s cooking. She would come and stay with us and get up at the crack of dawn (which could easily be 4am in summertime Stockholm) to bake cinnamon buns. I would sneak out of bed before anyone else was up to watch her and, if I was lucky, sample a first batch bun fresh from the oven.

I also remember being very young and helping my mother prepare herring to pickle for midsummer’s eve – a big holiday in Sweden. I remember feeling smug because I was allowed to stay up and gut fish until way past my bedtime. I think perhaps most of my earliest food memories invoke these feelings of something inclusive and exciting.

WHICH PART OF COOKING DO YOU ENJOY MOST?

I enjoy the whole process, from shopping to serving, perhaps even more than actually eating the food afterwards! I’m not sure I’m one for really pernickety dishes, though. And I hate straining purees and sauces through fine-mesh sieves- mostly because I don’t have the arm muscles for it. But that’s probably the only thing I find tedious!

copyright Kate illustration via stylejuicer

DO YOU HAVE A GAZILLION FRIENDS WHO ALL WANT YOU TO COOK FOR THEM OR DO YOU PREFER TO EAT OUT?

I love cooking for friends and having them round, so that never feels like a chore! My main problem at the moment is convincing them to reciprocate. A few have made noises claiming to be intimidated byncooking for me now that I cook for a living, which is such a shame as I absolutely love being cooked for and will pretty much eat anything (although I’m not keen on fudge and some offal!).

I almost always prefer to cook, but I do think that if you work in the food industry, it is important to eat out, partly, of course, for inspiration, but also to keep you grounded – I spend a lot of restaurant trips staring at the food in wide-eyed wonder. I’m lucky to live in an area of London where there is an eclectic array of great eateries. For example, last weekend we had dinner at a local favourite, the Hackney Pearl. I’ve also managed to get a reservation at Restaurant Story next month, which I’m very excited about.

HOW IMPORTANT ARE ORGANIC INGREDIENTS AND NUTRITION FOR YOU?

Both are important to me in my day-to-day cooking, although I think a little bit of something slightly naughty, like this crayfish recipe, does the soul good too. In general, I pick my ingredients with care and really enjoy coming up with healthier options. A long-standing obsession is experimenting with different kinds of grains – buckwheat, freekeh, spelt, etc.

However, in terms of the blog, I don’t always push a healthy eating or organic agenda. Always So Hungry is probably more a record of my experimentation and perhaps a call to others to push themselves a bit, whether in terms of ingredients or technique. Partly, buying healthy food and organic food is markedly more expensive and I think a heavy focus on this might alienate some people. I’d like to think that everyone could find something on Always So Hungry that they would want to make. Having said that, I do try to stick to seasonal produce, partly because that’s exactly when ingredients are cheaper and when they’re at their best!

ARE YOU GOOD AT IMPROVISING? HOW GOOD ARE YOU AT COOKING WITH WHAT’S LEFT IN THE CUPBOARD?

I love improvising and happy to cook with what I’ve got in the back of the fridge or cupboard (a favourite is spicy tomato and coconut milk soup). However, I’ve definitely had mixed success with some of my store-cupboard experiments. My other half has sworn off any more of my polenta concoctions!

ARE YOU A DELIA-ESQUE PRECISION COOK OR A CHUCK-IT-IN-JAMIE?

If I’m not working, I’m definitely a chuck-it-in-Jamie. I think the key is to taste, taste, taste and not be too gung ho, something I learned the hard way at Leiths School of Food and Wine. Baking, however, is slightly different. I’m much more precise when it comes to baking, but even then, a few grams outrarely seems to matter too much.

IF YOU COULD MEET A (FAMOUS) CHEF, WHO WOULD IT BE AND WHAT WOULD YOU TALK ABOUT?

Can I only choose one? I should probably say something like Escoffier circa 1893, but in all honesty, I’d love to share a bottle with Nigel and Nigella. We’d sit in Nigel’s garden and he could talk me through how to grow things without killing them (as I usually do). I’d talk to Nigella about love and loss. To be honest, the three of us might not even discuss food – cooking and life are so intertwined anyway, we probably wouldn’t even notice the difference. We’d eat panzella, drink a Domaene Gobelsburg rosé, followed by spaghetti vongole and affoggato for pudding. But I haven’t really thought about it all that much.

WHAT MADE YOU START BLOGGING AND WHY ARE YOU ADAMANT TO KEEP YOUR BLOG ADVERTISING FREE?

It really came from a spur-of-the-moment, let’s do something different, what the hell impulse. I’d just split up with my boyfriend and wanted something to distract me – I had no idea where it was going to lead or that I’d still be doing it four years down the line (and have got back together and still together with said boyfriend!)
I’ve only had a few offers of advertising and as much as I’d like to say there are lofty, integrity-driven reasons for keeping the blog advertising free, it is mostly because I like a cleaner, less-cluttered look. I suppose partly I also feel the blog never started as a means to an end, commercial or otherwise, so perhaps I’m worried that it would loose something if I were to go down that route.

THERE’S A GERMAN SAYING ‘THE EYE EATS FIRST’ – HOW IMPORTANT IS FOOD STYLING FOR YOU?

Very important – we are a completely image-driven world and nothing is more evocative than an image of a delicious plate of food. I’ve been assisting wonderful food stylists over the past year and a half and worked with some amazing photographers. I feel really lucky to have been privy to this rather unknown world and learn some of the tricks of the trade. Certainly cooking food in a restaurant or school kitchen and cooking for the camera are very different beasts!
Of course, if a recipe doesn’t work or tastes horrible, then naturally the picture is slightly redundant. I’m ashamed to say that in the earlier days of the blog, I would occasionally post a recipe that I didn’t necessarily love, but had made for a good picture. Shameful, really!

OTHER THAN COOKING WHAT ARE YOUR PASSIONS?

Does wine count? I had a career in the art world up until fairly recently and in some respects I feel like I enjoy going to exhibitions more now that I’m removed from that world. My boyfriend is a musician, as are a lot of our friends, so we enjoy going to gigs. I also have a lot of friends in the theatre world and love going to see their latest work. Last but by no means least, I’d say I’m pretty passionate about organisation – I like nothing better than putting things away in their rightful, logical place. Terrible, I know.

WHAT DOES THE FUTURE HOLD FOR YOU?

I’ve just turned 30 so I’m trying to celebrate that as much as possible this summer by enjoying the weather and catching up with friends. Work-wise, I’m assisting food and prop stylists on a variety of shoots and I’d love to do more writing and recipe testing if I can. Then from September, I’ll be at BBC Good Food Magazine for six months. After that, who knows? It’s both exhilarating and utterly terrifying!

copyright Steffi Dellner Blog via Stylejuicer

copyright-Steffi-Dellner-Blog-via-Stylejuicer01

copyright Steffi Dellner Alwayssohungry.com via Stylejuicer.com

COCONUT CRAYFISH WITH YUZU DIPPING SAUCE

August is crayfish season in Sweden. A time when everyone gets together to gorge on the little critters, drink a lot of snaps, wear silly paper hats and sing drinking songs. Traditionally, they are simply cooked with plenty of dill and served on their own – a delicacy requiring little else. But, in fact, they are delicious all year round and incredibly versatile. This recipe works particularly well as a bar snack.

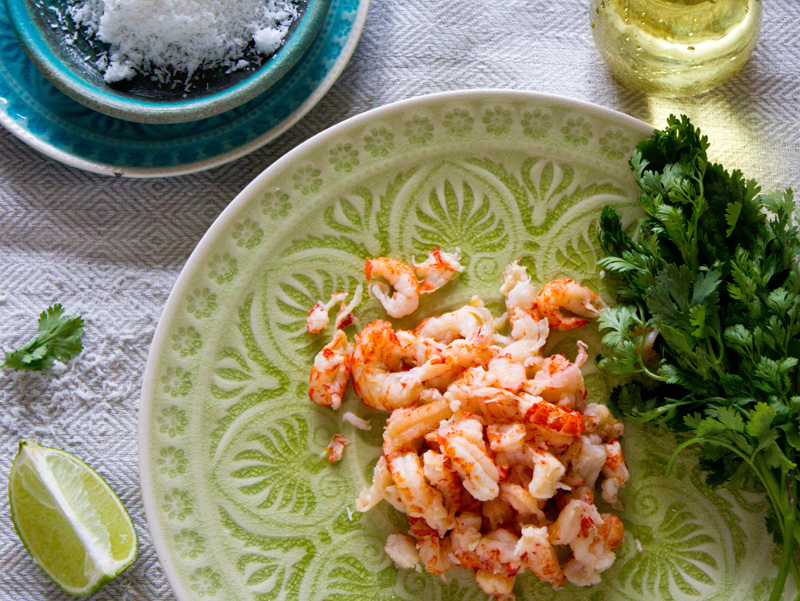
If you can get fresh or live crayfish, that is by far the best option. However, in this country, you will more than likely find their pre-cooked tails potted in brine at your fish counter. These work brilliantly in pasta and salads, but can also be used in this recipe, provided you don’t cook them for too long or they will be tough.

INGREDIENTS:

For the dipping sauce:
1.5 tbsp yuzu mixed with 1 tbsp. fresh lime juice. (Alternatively, use 3 tbsp. lime juice)
1 tbsp caster sugar
2 tbsp water
1.5 tbsp fish sauce
1 garlic clove, finely chopped
1/2 red chilli, finely chopped

For the crayfish:
150g crayfish tails
500ml vegetable or sunflower oil
65g plain flour
1 tsp salt
100ml water
75g desiccated coconut
50g breadcrumbs (panko preferable)

To serve:
Coriander, chopped roughly
Spring onion, sliced
Lime, cut into wedges

DIRECTIONS

1. First, make the dipping sauce. Mix together the yuzu and/or lime juice with the sugar and water until the sugar has dissolved. Taste and adjust to your liking.

2. Add the fish sauce, little by little, tasting to get a balance of sweet, sour and salty flavours. Finally add the finely chopped garlic and red chilli.

3. To prepare the crayfish, either remove tails from their shells or, if using pre-cooked crayfish, rinse and drain well. Either way, pat completely dry and refrigerate.

4. Heat the oil slowly in a frying pan to about 160 C (until a piece of bread browns in about 20 seconds). Meanwhile, make the batter by whiskingthe flour, salt and water together. You should have a mixture the consistency of a light pancake batter.

5. Combine breadcrumbs and coconut in a large bowl.

6. Once the oil is hot enough, dip a crayfish tail in the batter and then toss in the coconut crumbs. Deep fry for about 1-2 minutes, until crisp and golden brown. Drain on kitchen towel.

7. Continue with the remaining crayfish tails, frying in batches. You can ‘hold’ the done crayfish in a low (50 C) oven if you want to keep them warm, should you wish.

8. Serve topped with chopped coriander and spring onions and accompanied by lime wedges and the dipping sauce.

Enjoy and I hope you’re inspired!

More information | AlwaysSoHungry Blog by Steffi Dellner
Illustration | Kate Fisher

MARTHA’S MOST POPULAR SMOOTHIE RECIPES

29 July 2013

It’s smoothie season! With all this sunshine we’ve recently had there’s plenty of fresh fruit around and I’m going to get you in the mood with these top four smoothie recipes by Martha Stewart. In case you’re still slurping your full-fat latte here’s the sales pitch to make the smoothie switch.

Firstly, home made smoothies are delicious. They are a great and healthy way to start the day and much cheaper than shop-bought ones.

The smoothie recipes below are packed with fruit, veggies, milk, yoghurt and more. They give you more fibre and nutrients than juice does, ensuring good digestion and empower your immune system.

But best of all they provide you with the scientifically proven best ‘brain fuel’ in the form of fructose according to Perfect Smoothie. So power up, fill up and feel great!

martha stewart, perfect smoothie, healthy, drink, non-alcoholic, tasty, delicious, fruit, veggies, milk, yoghurt, fibre, nutrients, good digestion, empower immune system, recipe, fructose

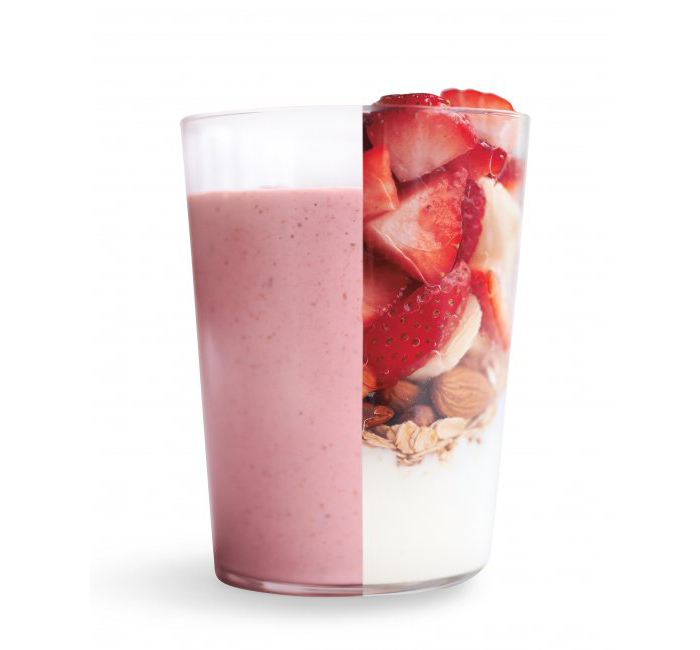
HEARTY FRUIT AND OAT SMOOTHIE
INGREDIENTS:

1 cup quartered strawberries
1 sliced banana
1/4 cup raw almonds
1/2 cup old-fashioned oats
1 cup low-fat vanilla yogurt
1 teaspoon maple syrup

martha stewart, perfect smoothie, healthy, drink, non-alcoholic, tasty, delicious, fruit, veggies, milk, yoghurt, fibre, nutrients, good digestion, empower immune system, recipe, fructose

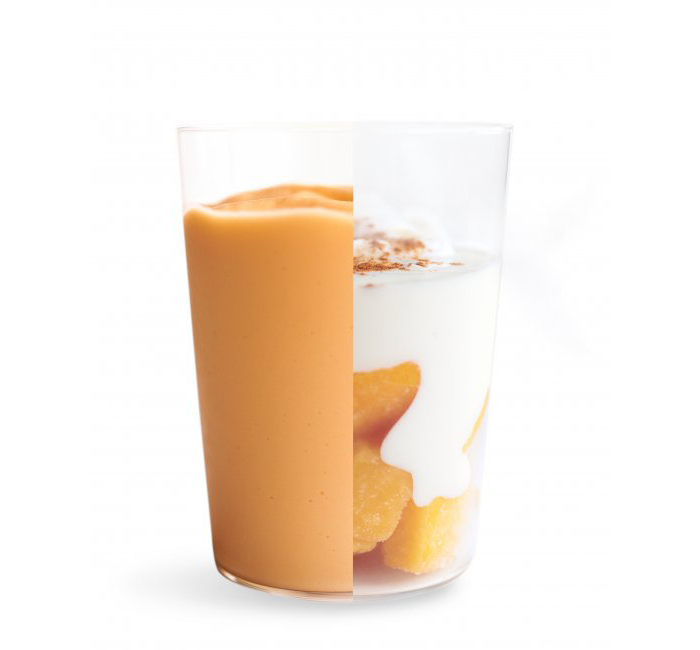
MANGO AND YOGHURT SMOOTHIE
INGREDIENTS:

1/4 teaspoon ground cinnamon
1 1/2 cups low-fat plain yogurt
2 1/2 cups frozen mango chunks
1 tablespoon honey
Juice from half lime

martha stewart, perfect smoothie, healthy, drink, non-alcoholic, tasty, delicious, fruit, veggies, milk, yoghurt, fibre, nutrients, good digestion, empower immune system, recipe, fructose

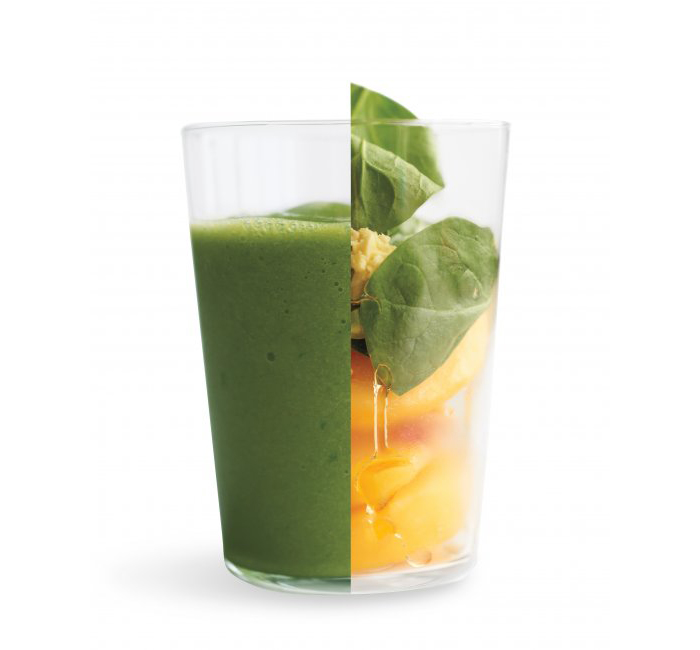
GREEN GINGER-PEACH SMOOTHIE
INGREDIENTS:

2 handfuls baby spinach
1 teaspoon grated peeled fresh ginger
2 cups frozen sliced peaches
2 teaspoons honey
1 1/4 cups water

martha stewart, perfect smoothie, healthy, drink, non-alcoholic, tasty, delicious, fruit, veggies, milk, yoghurt, fibre, nutrients, good digestion, empower immune system, recipe, fructose

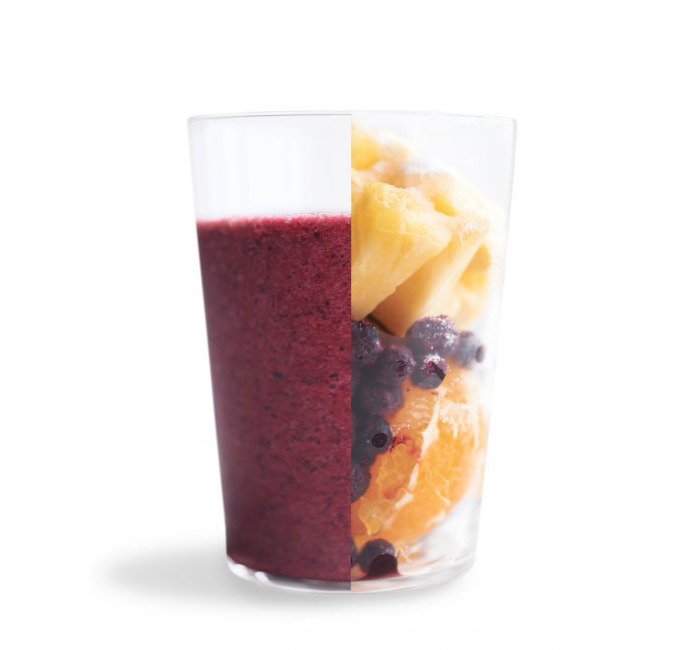
TROPICAL BLUEBERRY SMOOTHIE
INGREDIENTS:

2 teaspoons sugar
1 cup chopped pineapple
1 1/2 cups frozen blueberries
1 orange, seeded and cut into quarters
1/2–3/4 cup water

Enjoy and I hope you’re inspired!

MORE INFORMATION | Martha Stewart
PHOTOGRAPHY | Jonathan Lovekin