Monthly Archives: October 2013

HALLOWEEN COSTUMES FOR KIDS DON’T HAVE TO BE SPOOKY

31 October 2013

Halloween is great fun for kids but I’ve decided it doesn’t all have to be vampires, ghosts and witches. My personal favourite is any kind of SUPERHERO which works equally well for girls and boys. After all, as Kick-Ass showed us it is the innocent, cute looking little girls we’ve got to watch out for.

So, for a bit of fun I put a board together with my favourite shots of [some] superheroes and their dressed up companions, not exactly avoiding the clichés but all very cute and hopefully amusing.

PS: You can find some more cuteness and inspiration on my KID’S CORNER Pinterest board.

Halloween costumes for kids via stylejuicer

Enjoy and I hope you’re inspired!

Annie Signature Stylejuicer

Credits | I’d like to give credit to all the photographers and designers whose work is featured on this board. Sadly, most of the originators can’t be identified anymore so if you recognise your work here please email me and I’ll happily credit you and add your link.

PUMPKIN RAVIOLI WITH BROWNED BUTTER, ROSEMARY AND THYME

30 October 2013

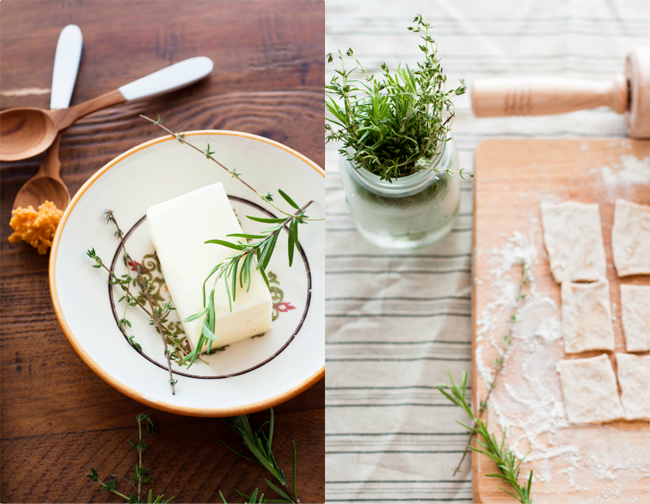
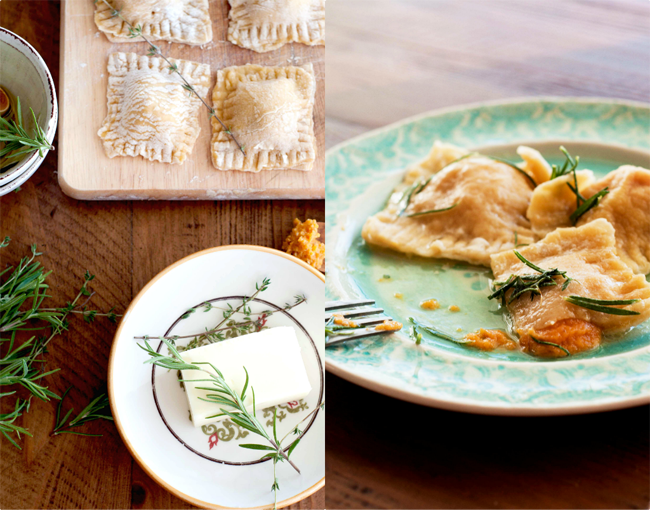
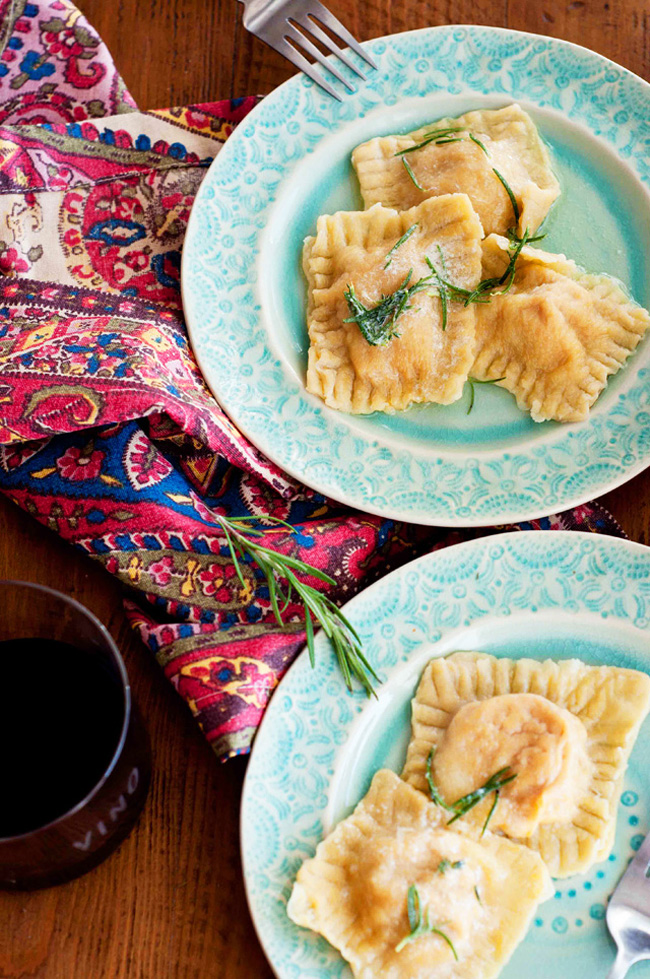
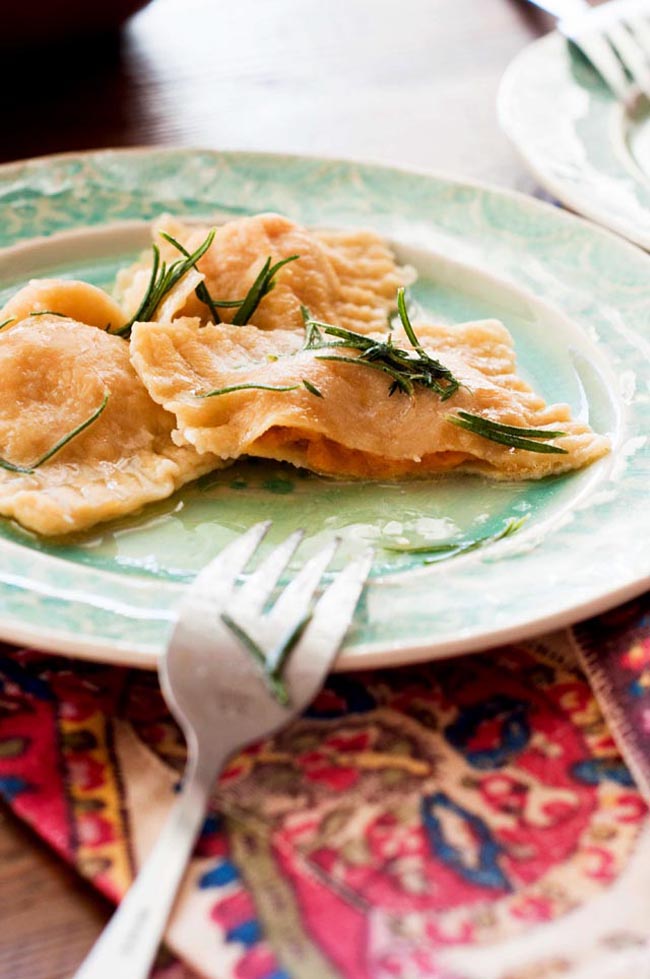
I bought two pumpkins to carve with the kids at the weekend and was looking for a suitable recipe for all the left-over pumpkin when I came across Amanda Marshall’s delicious recipe and photography of her pumpkin filled ravioli! Score!

Her food photography is inspiring and the recipe looks divine. A simple, healthy and seasonal dish, what could be better!? Living on the subtropical Japanese island of Okinawa with her husband and young son Amanda has been inspired by her mother’s Mediarranean cooking and her own travels around the world. She’s clearly an ambitious cook and has a great eye for food styling and photography.

Please check out her blog Marshalls Abroad for more inspiration and juicy photography.

copyright Amanda Marshall Pumpkin Ravioli via Stylejuicer

copyright-AmandaMarshall-PumpkinRavioli-via-Stylejuicer02

copyright-AmandaMarshall-PumpkinRavioli-via-Stylejuicer08

copyright-AmandaMarshall-PumpkinRavioli-via-Stylejuicer07

copyright-AmandaMarshall-PumpkinRavioli-via-Stylejuicer06

copyright-AmandaMarshall-PumpkinRavioli-via-Stylejuicer03

copyright Amanda Marshall Pumpkin Ravioli via Stylejuicer

*NOTE: I’ve taken the liberty and adapted her recipe from tinned to fresh pumpkin and put it in my usual format of ingredients list followed by directions.

PUMPKIN RAVIOLI WITH BROWNED BUTTER, ROSEMARY AND THYME
INGREDIENTS:

For the pasta dough:
5 eggs
1 tablespoon of salt
1 tablespoon of olive oil
3 cups of all-purpose flour

For the pumpkin filling:
1-3/4 cups mashed pumpkin
[*NOTE: Amanda uses tinned pumpkin but you can very easily use fresh pumpkin which you need to cut into large chunks and put in a roasting tin to soften. Drizzle with olive oil and salt and pepper and roast for 30-40 minutes. If you don’t want it to crisp up like roasted vegies do, you could cover it with foil. After that you puree the pumpkin and add the other ingredients and wait for the filling to be cool before putting it in the ravioli.]
1 cup of freshly finely grated Pecorino
2 Teaspoons of Nutmeg
1 Teaspoon Cinnamon
a dash of salt and pepper.

For the butter:
3 tablespoons of butter
fresh rosemary and thyme

DIRECTIONS:

This is a very simple pasta dough and my basic method. In a small bowl, beat the eggs, salt & olive oil. In a large bowl, place the flour and create a well in the middle with your hands. Pour in the egg mixture to the well. Stir with a fork or your hands to fold it all together until the egg mixture is absorbed and the dough forms into a sticky ball. Flour your hands and divide the dough into 3 separate chunks. Knead each dough a bit to form it into a smooth ball. Cover each in cellophane and refrigerate for a few hours.

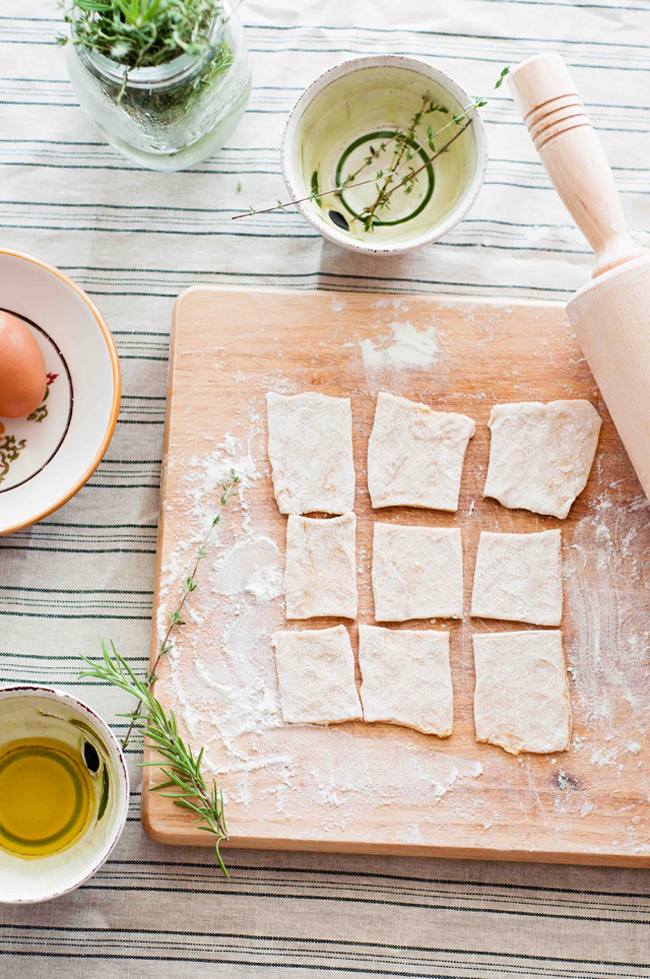
Roll out the ball of dough as flat as you can get it. I cut mine into squares with a knife, but you could use a cookie cutter for a different shape or to get it more exact. I liked mine imperfect… rustic.

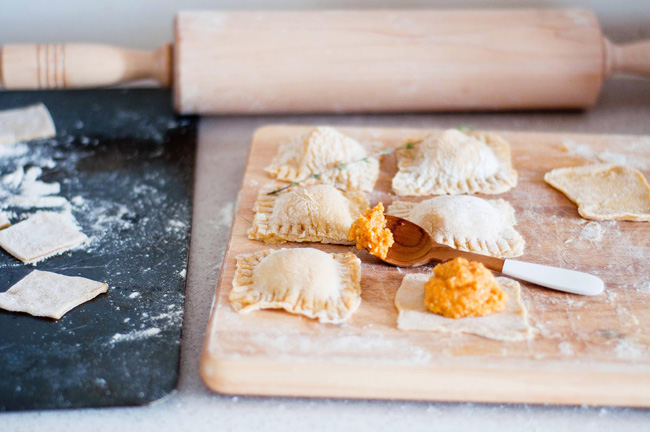
After you’ve cut the dough into squares, it helps to roll each square a bit more before scooping on the pumpkin mixture. Place another square on top, and using a fork, press the two pieces of dough together at the edges, which creates a pretty border.

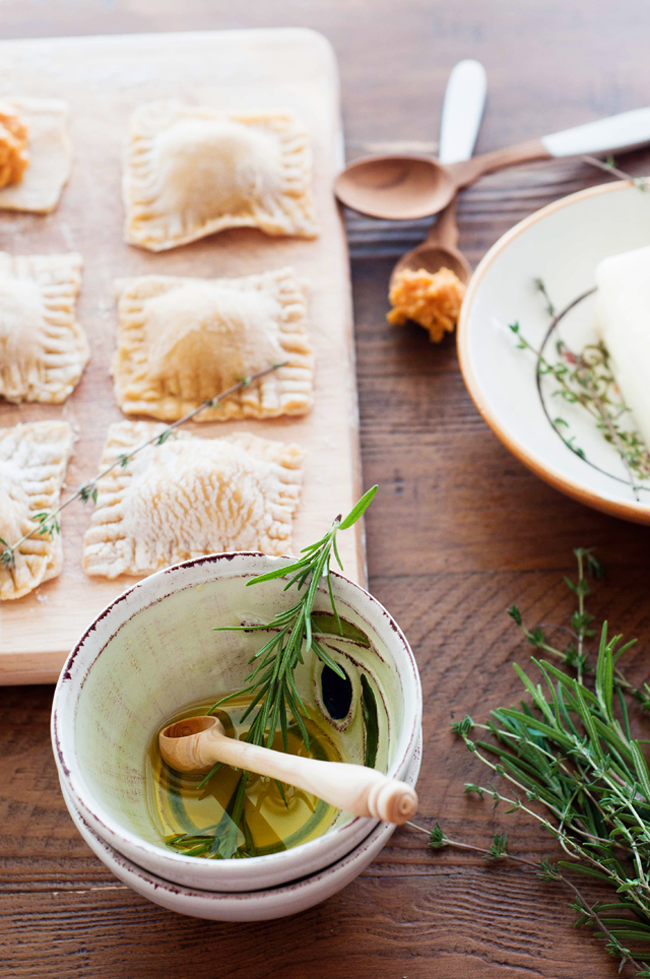
Once you’ve finished putting together the raviolis, place them in a pot of well sea-salted boiling water until they rise to the top. About 3-4 minutes. Carefully scoop them out into a colander to drain.

Melt 3 tablespoons of butter. Just before it starts to brown, add fresh rosemary and thyme leaves stirring until the butter slightly browns. Pour over raviolis… take a deep breath before you inhale the whole plate!

Enjoy and I hope you’re inspired!

Annie Signature Stylejuicer

Photography & recipe | Amanda Marshall
Amanda’s blog | Marshalls Abroad

DON’T BE SCARED! LAST MINUTE HALLOWEEN DIY IDEAS

29 October 2013

It’s HALLOWEEN week here on Stylejuicer and to kick off I’ve collected some genuinely easy* (I use the term loosely) Halloween DIY ideas to dress and impress.

I don’t know about you but though I love the idea of handcrafting and DIY I simply don’t have the time! I adore the people who do and find the time to blog about it but I’m convinced that they’ve got more than 24 hours in their day or they are insomniacs or they’ve got a housekeeper or don’t watch DVD box sets or MAYBE they’ve just got different priorities. Hmmm…

So now that I’ve confessed my DIY envy I want to share some ideas with you that are fun and easy to recreate. Just take them as a template and free style to your hearts content. It doesn’t have to be perfect, the wonkier and spookier the better. It’s Halloween after all!

Halloween DIY via Stylejuicer
SCARY BALLOONS: So effective and easy via Swedish blog Trendenser by Frida Ramstedt. Just get your marker pen out and copy those spooky faces but don’t push down too hard or… POP!

Halloween-DIY-via-Stylejuicer08
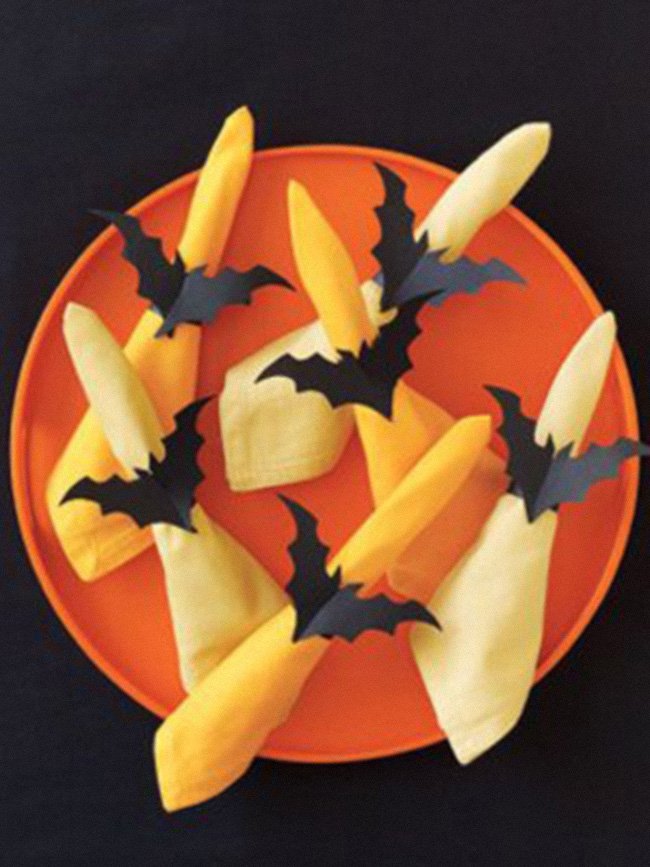
BAT NAPKIN HOLDERS: Napkin holders are always a fab way to decorate the table and these paper bats are easy to cut and put together. If you need more instructions just follow this link to Woman’s Day.

Halloween-DIY-via-Stylejuicer17
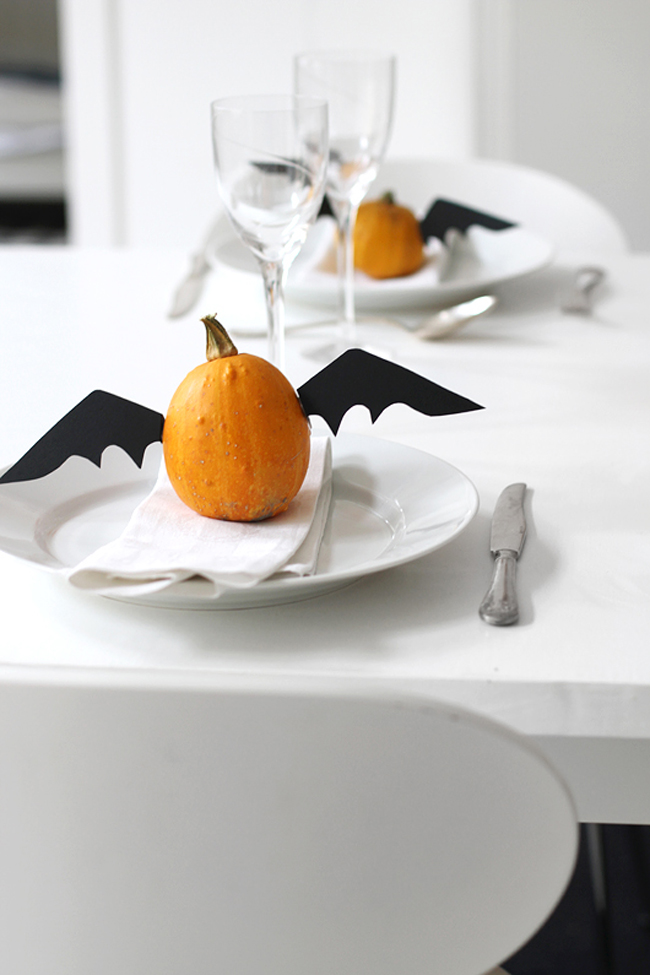
BAT WING MINI PUMPKINS: And another idea for stylish and effective table decorations by Frida Ramstedt of Trendenser. Some mini pumpkins with DIY paper bat wings. Genius!

Halloween-DIY-via-Stylejuicer14
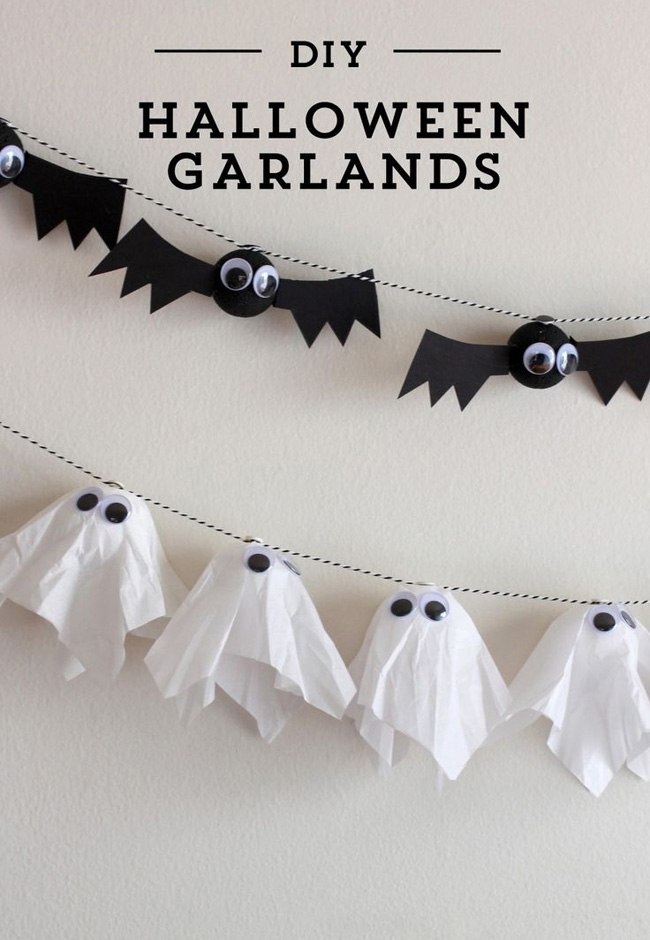
GHOST & BAT GARLAND: I adore these cute little ghosts and bat garlands which I found over on evite.

Halloween-DIY-via-Stylejuicer02
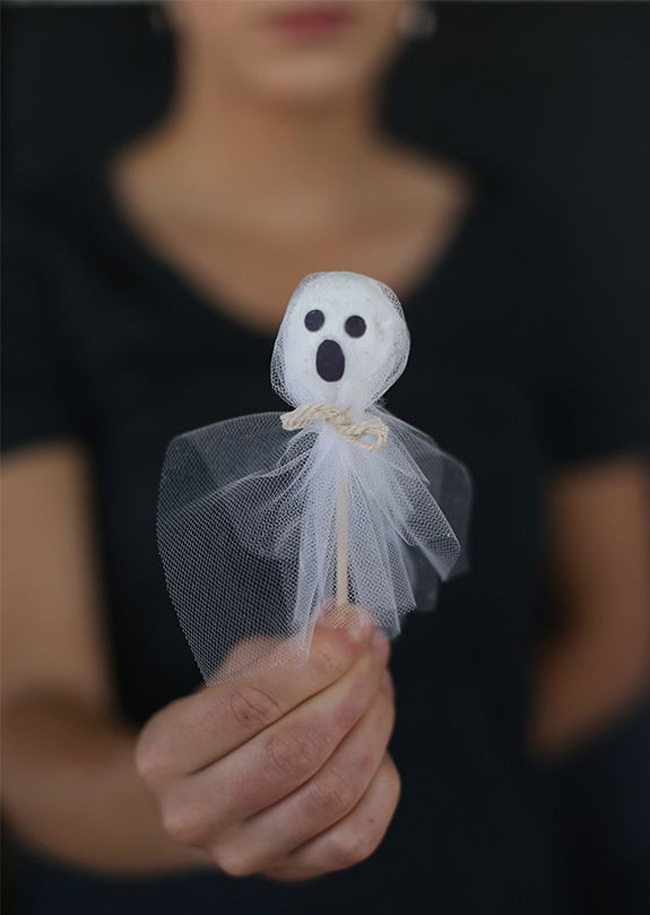
GHOST LOLLIES: Dress up your Halloween lollies as scary ghosts by the crafty Liz Stanley from Say Yes To Hoboken.

Halloween-DIY-via-Stylejuicer01
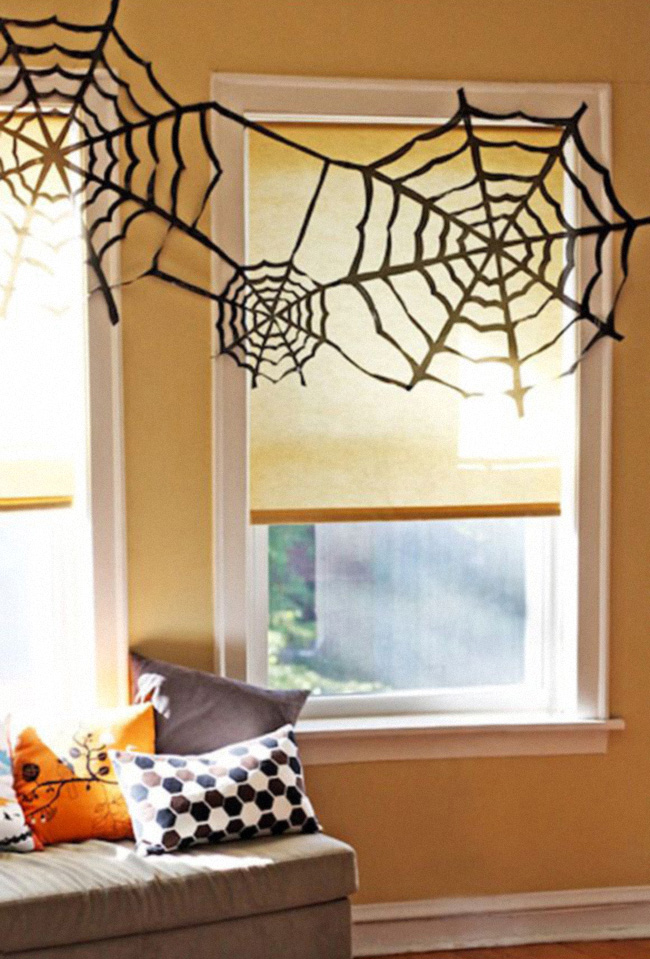
BIN LINER SPIDERS WEB: I love any DIY idea that involves materials found in my kitchen cupboard so I just had to share this spiders web with you made from a humble bin liner which I found over on How About Orange. Neat idea!

Halloween-DIY-via-Stylejuicer12
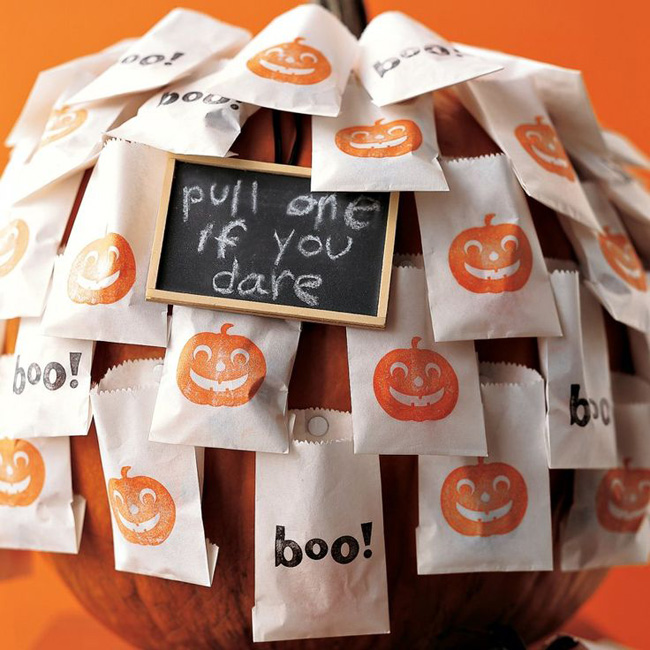
SELF-SERVE TREAT BAGS: Martha Stewart has of course got THE best idea for self-serve Halloween treat bags. You can find instructions here or just take this as a concept and stencil or paint your own little bags. They’ll look gorgeous pinned to a pumpkin either way.

Halloween-DIY-via-Stylejuicer06
RIP CHOCOLATE DESSERT: Now, you’re going to be upset with me as I can’t find the source for this recipe BUT I wanted to include these scary desserts anyway as I think you’ll be able to make up your own quite easily. It looks to me like a chocolate mousse with roughly chopped dark chocolate as top soil and a RIP decorated chocolate chip cookie as a tombstone. Super scary but no doubt delicious.

Halloween DIY via Stylejuicer

TRICK OR TREAT CHALK BOARD: And for all you creative hand lettering enthusiasts out there including myself I found this Trick or Treat chalk board on Etsy by LilyandVal. If you’ve got oodels of time do it yourself or just put an order in – no one will ever know! 😉

Enjoy and I hope you’re inspired!

Annie Signature Stylejuicer

INTERIOR TRENDS: DARK WALLS

24 October 2013

I’ve been inspired by Jessica Helgerson’s office fit out earlier this week which featured dark, moody colours and a luxurious palette of textures from exposed brick to leather and shiny steel. So, I wanted to find out how this interior trend could work in a domestic environment and have come across some great examples I’d like to share with you today.

Heading into winter dark walls and rooms feel more natural to me. Like a person they can be dressed up and wrapped up with heaps of soft furnishings in tactile fabrics. Imagine smooth velvet, thick wool, soft mohair or luxurious cashmere. You choice of colour can add accents and really bring a room to life like the pink velvet sofa towards the top of the moodboard below.

If this is too adventurous for you have a look at painting just one wall in a dark statement colour to draw attention to a particular area or install a dark shelving system. I also love the idea of a chalk board wall in either the kitchen or the kid’s room as it’s so versatile and playful. Another way of making a statement is to add oversized dark lampshades which give any room an instant wow factor.

For more inspiration just pop over to my INTERIOR STYLING and INTERIOR DESIGN boards on Pinterest.

Dark Interiors by Stylejuicer

Enjoy and I hope you’re inspired!

Annie Signature Stylejuicer

Credits | I’d like to give credit to all the photographers and designers whose work is featured on this board. Sadly, most of the originators can’t be identified anymore so if you recognise your work here please email me and I’ll happily credit you and add your link.
OTTOLENGHI’S CHOCOLATE KRANTZ CAKE

23 October 2013

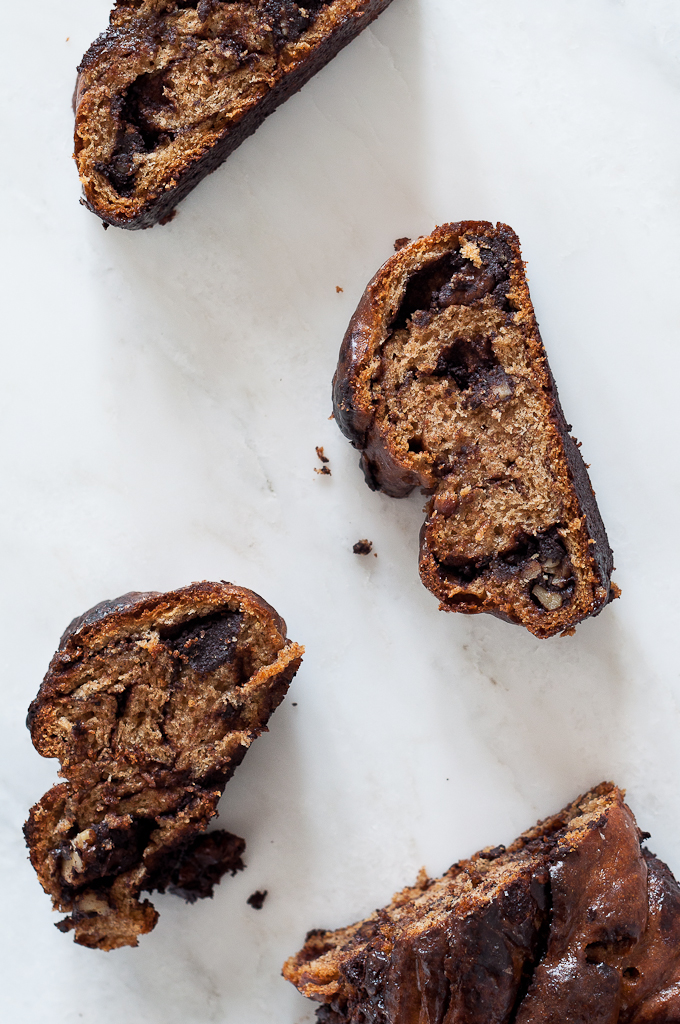
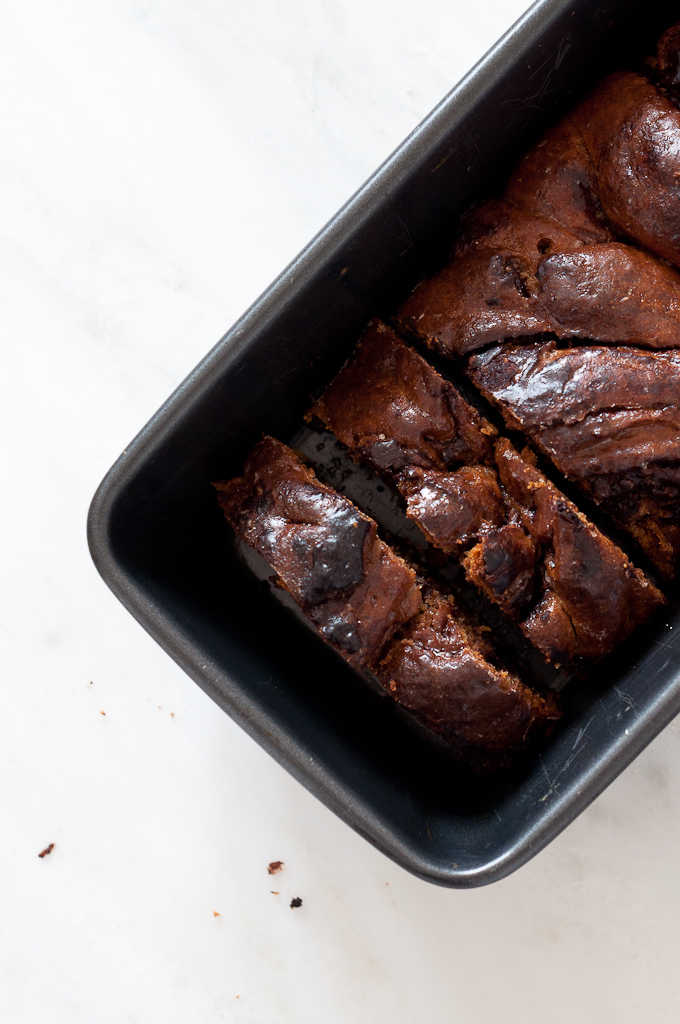
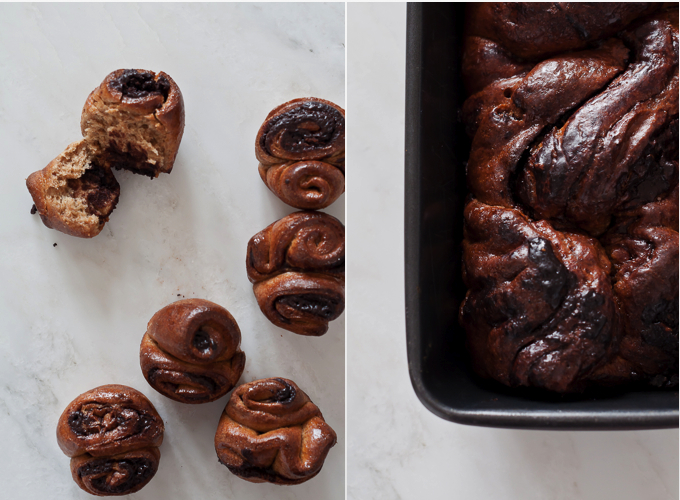
Thanks to the fabulous Italian photographer Valeria Necchio I soooo want to make this Chocolate Krantz Cake by Yotam Ottolenghi which fits right in my MOODY WEEK with it’s dark chocolate core.

She’s one of the best food photographers (and chefs!) around and I adore her modern take on food photography. Her blog Live Love Food is a favourite of mine and her featured recipes are always inspiring. How can you not love a girl who says:

I love eating and at the same time I like feeling good. So, I found my balance in seasonal, local food and healthy cooking with high quality key ingredients…

By her own admission she was a bit wary of making this cake which comes with a gentle warning of ‘it isn’t easy or quick’ by Yotam himself but going through the process she had a great time and the cake plus her freestyle left-over buns turned out perfectly – just like her photos.

Below is the recipe from Jerusalem by Yotam Ottolenghi & Sami Tamimi via Tara O’Brady’s blog Seven Spoons.

copyright-Valeria-Necchio-Chocolate-Krantz-Cake-01

copyright-Valeria-Necchio-Chocolate-Krantz-Cake-02

copyright-Valeria-Necchio-Chocolate-Krantz-Cake-05

copyright-Valeria-Necchio-Chocolate-Krantz-Cake-03

copyright Valeria Necchio Chocolate Krantz Cake

CHOCOLATE KRANTZ CAKE (AND FREESTYLE LEFT-OVER BUNS)

[Extract from the book]

Making a krantz isn’t easy or quick. You need to let the dough rise overnight and then fill and shape it, which is quite an elaborate process. But […] it is well worth it! […] They are just the sort of thing everyone hurls themselves at as soon as they come out of the oven. They will also keep for up to two days at room temperature, wrapped in foil, and up to a couple of weeks when frozen. For a fabulous alternative to the chocolate filling, brush each dough half with 6 tbsp / 80 g melted unsalted butter and then sprinkle with 1⁄2 cup / 120 g light muscovado sugar, 1 1⁄2 tbsp ground cinnamon, and scant 1⁄2 cup / 50 g coarsely chopped walnuts; then roll as described in the chocolate version.

Makes 2 loaves

INGREDIENTS:

For the dough:
4 cups / 530 g all-purpose flour, plus extra for dusting
1/2 cup / 100 g superfine sugar
2 teaspoons fast-rising active dry yeast
grated zest of 1 small lemon
3 extra-large free-range eggs
1/2 cup / 120 ml water
rounded 1/4 teaspoon salt
2/3cup / 150 g unsalted butter, at room temperature, cut into 3/4-inch / 2cm cubes
sunflower oil, for greasing

For the chocolate filling:
scant 1/2 cup / 50 g confectioners’ sugar
1/3 cup / 30 g best-quality cocoa powder
4 oz / 130 g good-quality dark chocolate, melted
1/2 cup / 120 g unsalted butter, melted
1 cup / 100 g pecans, coarsely chopped
2 tablespoons superfine sugar

For the sugar syrup (enough for both cakes):
2/3 cup / 160 ml water
1 1/4 cups / 260 g superfine sugar

DIRECTIONS:

For the dough, place the flour, sugar, yeast, and lemon zest in a stand mixer fitted with the dough hook and mix on low speed for 1 minute. Add the eggs and water and mix on low speed for a few seconds, then increase the speed to medium and mix for 3 minutes, until the dough comes together.

Add the salt and then start adding the butter, a few cubes at a time, mixing until it is incorporated into the dough. Continue mixing for about 10 minutes on medium speed, until the dough is completely smooth, elastic, and shiny. During the mixing, you will need to scrape down the sides of the bowl a few times and throw a small amount of flour onto the sides so that all of the dough leaves them. Place the dough in a large bowl brushed with sunflower oil, cover with plastic wrap, and leave in the fridge for at least half a day, preferably overnight.

Grease two 2 1⁄4-lb / 1kg loaf pans (9 by 4 inches / 23 by 10 cm) with some sunflower oil and line the bottom of each pan with a piece of waxed paper. Divide the dough in half and keep one-half covered in the fridge.

Make the filling by mixing together the confectioners’ sugar, cocoa powder, chocolate, and butter. You will get a spreadable paste. Roll out the dough on a lightly floured surface into a rectangle measuring 15 by 11 inches (38 by 28 cm). Trim the sides** to make them even, then position the dough so that a long side is closest to you. Use an offset spatula to spread half the chocolate mixture over the rectangle, leaving a 3⁄4-inch / 2cm border all around. Sprinkle half the pecans on top of the chocolate, then sprinkle over half the superfine sugar.

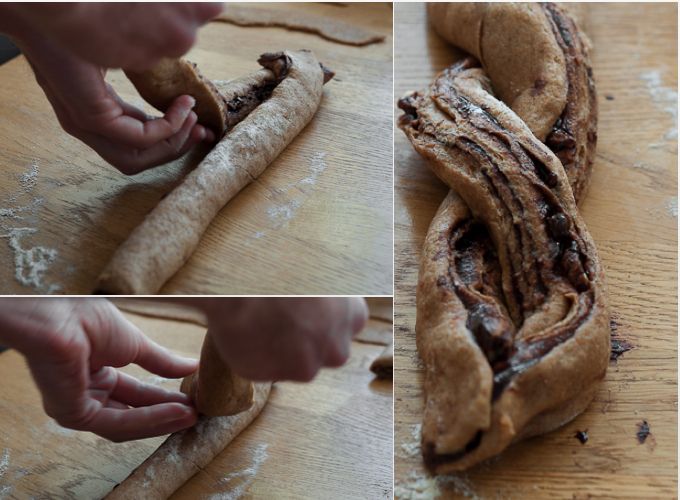
Brush a little bit of water along the long end farthest away from you. Use both hands to roll up the rectangle like a roulade, starting from the long side that is closest to you and ending at the other long end. Press to seal the dampened end onto the roulade and then use both hands to even out the roll into a perfect thick cigar. Rest the cigar on its seam. Trim about 3⁄4 inch / 2 cm off both ends of the roulade with a serrated knife. Now use the knife to gently cut the roll into half lengthwise, starting at the top and finishing at the seam. You are essentially dividing the log into two long even halves, with the layers of dough and filling visible along the length of both halves. With the cut sides facing up, gently press together one end of each half, and then lift the right half over the left half. Repeat this process, but this time lift the left half over the right, to create a simple, two-pronged plait. Gently squeeze together the other ends so that you are left with the two halves, intertwined, showing the filling on top. Carefully lift the cake into a loaf pan.

Cover the pan with a wet tea towel and leave to rise in a warm place for 1 to 1 and 1⁄2 hours. The cake will rise by 10 to 20 percent. Repeat the whole process to make the second cake.

Preheat the oven to 375°F / 190°C, making sure you allow plenty of time for it to heat fully before the cakes have finished rising. Remove the tea towels, place the cakes on the middle rack of the oven, and bake for about 30 minutes, until a skewer inserted in the center comes out clean.

While the cakes are in the oven, make the syrup. Combine the water and sugar in a saucepan, place over medium heat, and bring to a boil. As soon as the sugar dissolves, remove from the heat and leave to cool down. As soon as the cakes come out of the oven, brush all of the syrup over them. It is important to use up all the syrup. Leave the cakes until they are just warm, then remove them from the pans and let cool completely before serving.

* Notes from Tara O’Brady:
• I used 100% regular wholemeal flour instead of the all-purpose/plain flour and it worked perfectly fine.
• Instead of superfine sugar, I used demerara caster sugar, also with good results.
• I didn’t have any lemons when I made these so I used 1 tsp pure vanilla extract in its place.
• I used large rather than extra-large eggs and they were OK.
• Since I don’t keep sunflower oil in the house, I used ghee – which worked well for the task.
• I like very dark chocolate, so I used 85% dark chocolate – in my humble opinion, it made a great contrast with the sweetness of the syrup and balanced things out wonderfully.
• I swapped pecans for walnuts. I am sure hazelnuts would be fantastic, too.
• I ended up using less syrup (about 2/3 of the total). Although the author heatedly suggests to use all the syrup, I am not fond of super-sugary stuff, so I think I will use even less next time. I think you should listen to whatever your sweet tooth tells you…

** Notes from Valeria Necchio:
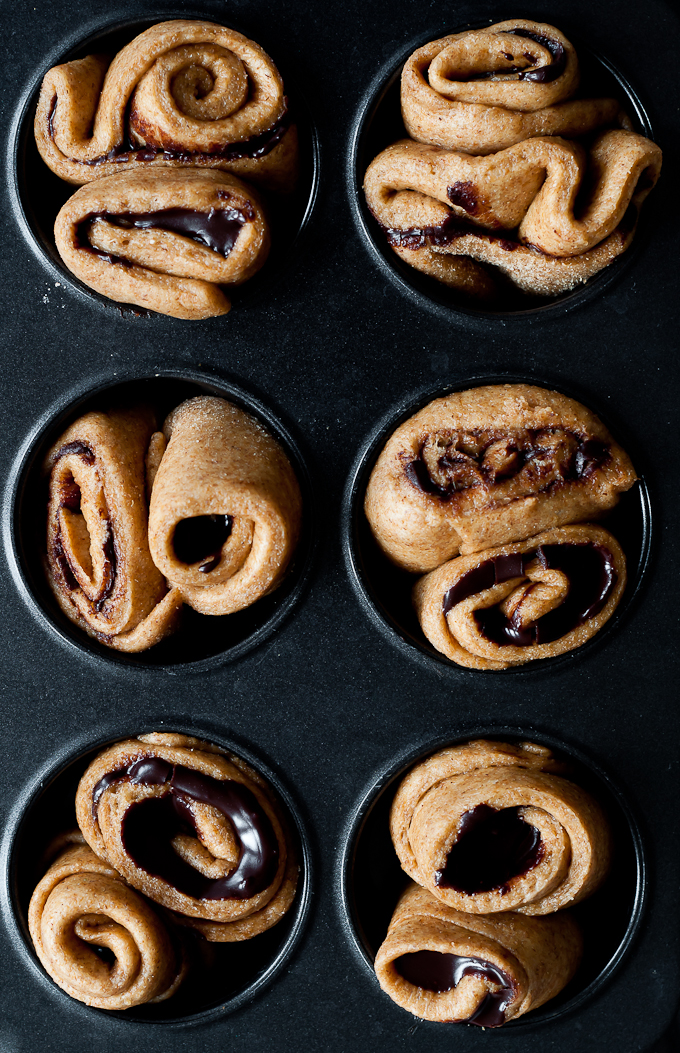
• I used the scrapes of dough and a bit of leftover chocolate filling to make those little rolled buns (pictured above), which I baked in a muffin tin for less than half the amount of time it took to bake the loaves. They were delicious and totally moreish. I will try to make cinnamon buns out of this recipe sometime soon – as I think the results might be overwhelmingly good.

Enjoy and I hope you’re inspired!

Annie Signature Stylejuicer

Photography | Valeria Necchio
Recipe | Yotam Ottolenghi
Notes | Seven Spoons & Valeria Necchio